Step - By - Step IIS Configuration For Run Website In Local Network
1-Run the IIS Manager - in the Start Menu type "IIS"

2-Right-Click on 'Sites' and click 'Add Web Site'
Note: You may need to 'Expand' the explorer branch to allow you to see 'Sites'

3-Enter a 'Site Name', this can be anything (E.g. MyNewSite), 'Physical Path' (E.g. C:\MY_SITE) and click OK

Router/Windows Firewall exception
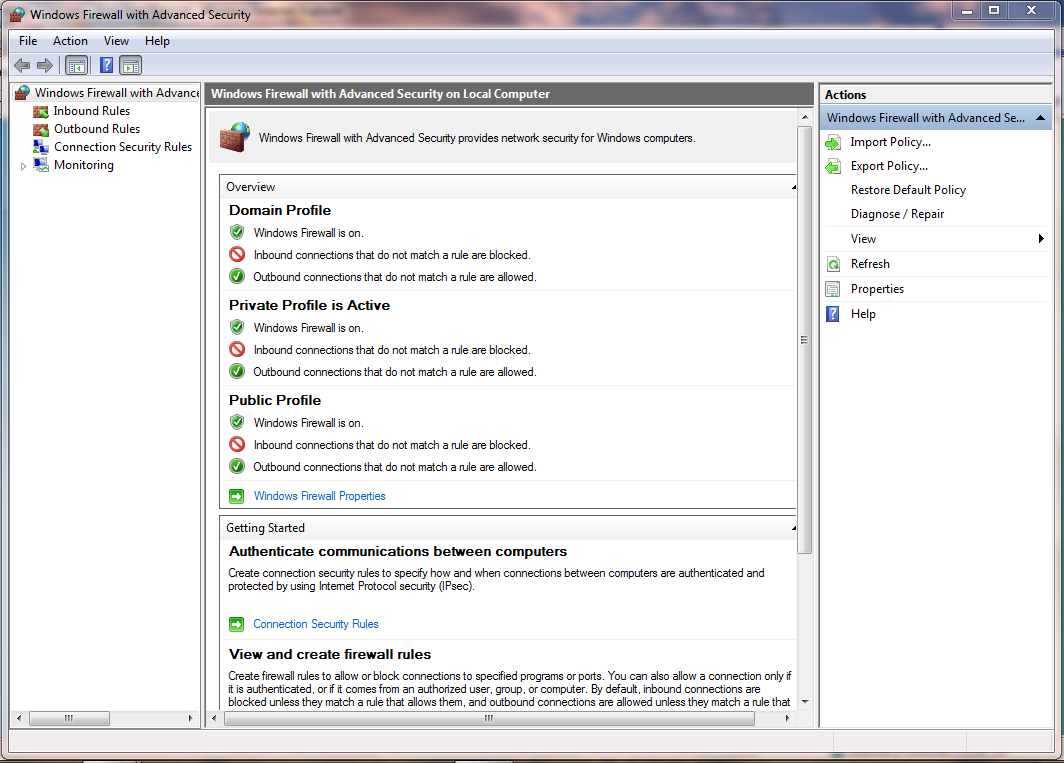
4-In the Start Menu, type "firewall" and click 'Windows Firewall with Advanced Settings'
5-Click 'Inbound Rules' then 'New Rule' to start the 'New Rule Wizard. Click 'Port' then 'Next'

6-Click 'TCP' and enter port '80' then click 'Next'

7-Click 'Allow the connection' then click 'Next'

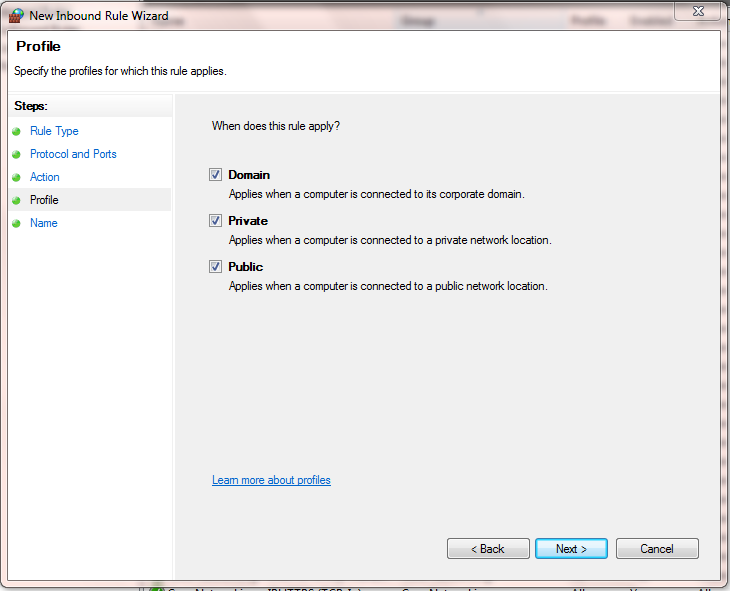
8-Click the rules that apply, then 'Next'
9-Lastly, name the new rule & click 'Finish'

10-You will see that the new rule has now been created and you can close Windows firewall

1-Run the IIS Manager - in the Start Menu type "IIS"
2-Right-Click on 'Sites' and click 'Add Web Site'
Note: You may need to 'Expand' the explorer branch to allow you to see 'Sites'
3-Enter a 'Site Name', this can be anything (E.g. MyNewSite), 'Physical Path' (E.g. C:\MY_SITE) and click OK
Router/Windows Firewall exception
4-In the Start Menu, type "firewall" and click 'Windows Firewall with Advanced Settings'
5-Click 'Inbound Rules' then 'New Rule' to start the 'New Rule Wizard. Click 'Port' then 'Next'
6-Click 'TCP' and enter port '80' then click 'Next'
7-Click 'Allow the connection' then click 'Next'
8-Click the rules that apply, then 'Next'
9-Lastly, name the new rule & click 'Finish'
10-You will see that the new rule has now been created and you can close Windows firewall
Enjoy : - Your Website Work In Local Network.